Cinematic environment prompt for a flooded future city
Cinematic environment prompt example focused on scale, atmosphere, and a readable human anchor. This page documents the exact prompt attached to the existing site-generated asset, then explains the visual decisions a reviewer can verify.
Published August 31, 2026 · Updated August 31, 2026 · Created and reviewed by GrokImage20.com from the recorded prompt and visible asset.
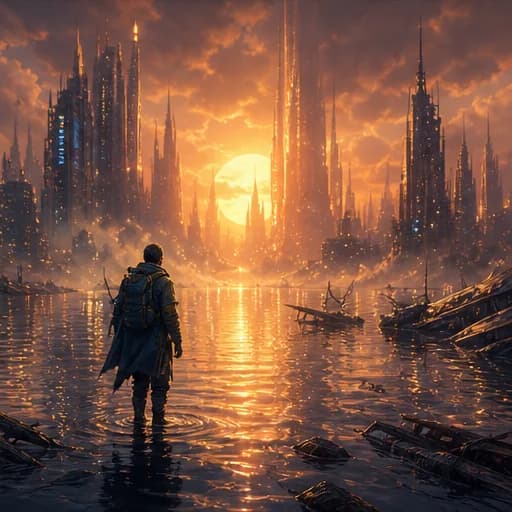
A lone traveler facing a flooded future city at sunset, warm reflections, wide composition.
The recorded prompt calls for a wide composition; the gallery shows a square presentation crop.Open this promptThe brief in verifiable parts
- Intended use
- Cinematic environment concept
- Subject
- Traveler facing a flooded city
- Mode
- Text to image
- Composition
- Wide scene with a human scale anchor
- Prompt framing
- Wide composition
- Gallery crop
- 1:1 square
- Main review risk
- Figure anatomy, reflections, and skyline structure
Method: this case connects one recorded prompt with the visible site asset. It is a creative analysis, not a controlled benchmark or a promise that another generation will reproduce the same pixels. Prompt-directed framing is reported separately from the square gallery crop, and unknown provider settings are not inferred.
The narrative contained in one sentence
A lone traveler supplies a point of view, while facing a flooded future city gives that figure a clear relationship to the environment. The prompt does not dictate a costume, identity, franchise, or named location, so the image can explore an original scene without pretending to reproduce protected characters or real events. Flooded changes the ground plane into a reflective surface and suggests history without explaining it. Sunset introduces a predictable warm light direction and a transition in the sky. Warm reflections connect the water to that light. Wide composition tells the model that the city and atmosphere matter more than a close portrait. Together, these elements form a compact cinematic brief rather than a list of disconnected visual adjectives.
Using a human figure to communicate scale
Large environments often become visually impressive but emotionally vague. A single traveler gives the viewer an immediate scale reference and a place to enter the scene. Lone is useful because a crowd would compete with the skyline and create many small anatomical risks. Facing away can reduce the need for detailed facial identity, but posture and silhouette still need inspection. Keep the figure clearly separated from the brightest reflections so it remains legible at thumbnail size. If the scene is intended for a game concept, describe the gameplay-relevant route or landmark. If it is intended for a book cover, reserve safe space for title typography instead of expecting generated text to be correct.
Atmosphere, water, and city structure
Warm sunset color can unify the scene, but it should not erase spatial depth. Useful variations can describe foreground ripples, a middle-distance traveler, and a softened skyline. Reflections should broadly correspond to buildings and the sun, even when the style is imaginative. Inspect water boundaries around the figure and architecture; inconsistent horizons or submerged structures can make the scene feel accidental. Future city is intentionally open, so adapt it with architectural language such as modular towers, elevated transit, or climate-adapted terraces rather than piling on generic words like epic and ultra-detailed. Specific nouns create more controllable differences than extra quality adjectives. Avoid visual references to a living artist unless you have permission and a clear reason to use them.
Adapting the prompt for posters and game visuals
For a poster, specify where the title block will sit and reduce detail behind that region. For a game loading screen, request a landscape ratio and keep important landmarks away from UI overlays. For a social crop, create a separate composition instead of trimming the traveler or skyline from a wide master. You can turn the scene into image-to-image editing by supplying a rough environment sketch or an approved reference and asking the model to preserve the horizon and figure placement. Change one creative dimension per iteration—time of day, water level, architecture, or palette—so reviewers can understand what caused the result. Save selected prompts beside the final assets rather than relying on memory.
What to verify before publication
Examine the traveler’s limbs, equipment, reflection, and contact with the water. Trace major building lines and make sure bridges, windows, and towers do not dissolve in distracting ways. Check that the skyline has an intentional focal point and that atmospheric haze does not simply hide generation errors. If the image supports a factual climate article, do not present this fictional concept as documentary evidence. Add a caption that describes it as an illustration and verify any accompanying claims independently. For commercial projects, review licensing, trademarks, recognizable architecture, and accidental character resemblance. The final asset shown here is an original site concept and the prompt is shared as a learning example, not as a guarantee of an identical output.
Likely failure modes and the next useful iteration
Wide environment images often lose their human anchor: the traveler becomes too small, merges into a reflection, or develops an unclear silhouette. City structures may also repeat mechanically or dissolve at the horizon. Judge the scale relationship before adding more stylistic detail. If the traveler is unreadable, keep the skyline and sunset but request stronger silhouette separation and a clearer middle-distance position. If the architecture lacks hierarchy, identify one landmark and simplify competing towers. A poster version should reserve a deliberate title area in a separate iteration. Do not treat extra haze as a universal fix; it can conceal errors while weakening the scene's depth and navigational logic.
Continue with the right workflow
Use the AI image prompt guide to build another brief from subject, environment, composition, light, and constraints. The complete generation workflow explains aspect ratios and review passes. When a real product or existing visual must remain recognizable, follow the reference-image editing guide and state both the requested change and the details that must stay consistent.
Adapt the decisions, not just the nouns.
Open the generator with this recorded prompt, then change its subject, layout, and constraints for your project.